Hello crafty friends,
Today, I’m excited to share a super adorable interactive card that I put together using a fun mix of products from several of my favorite brands. While I originally designed it as a birthday card, the overall layout and the sweet little images make it incredibly versatile—you could easily repurpose this design to welcome a new neighbor or even thank a teacher. There are just so many charming possibilities with this card style!
Let’s take a closer look at the card I created.

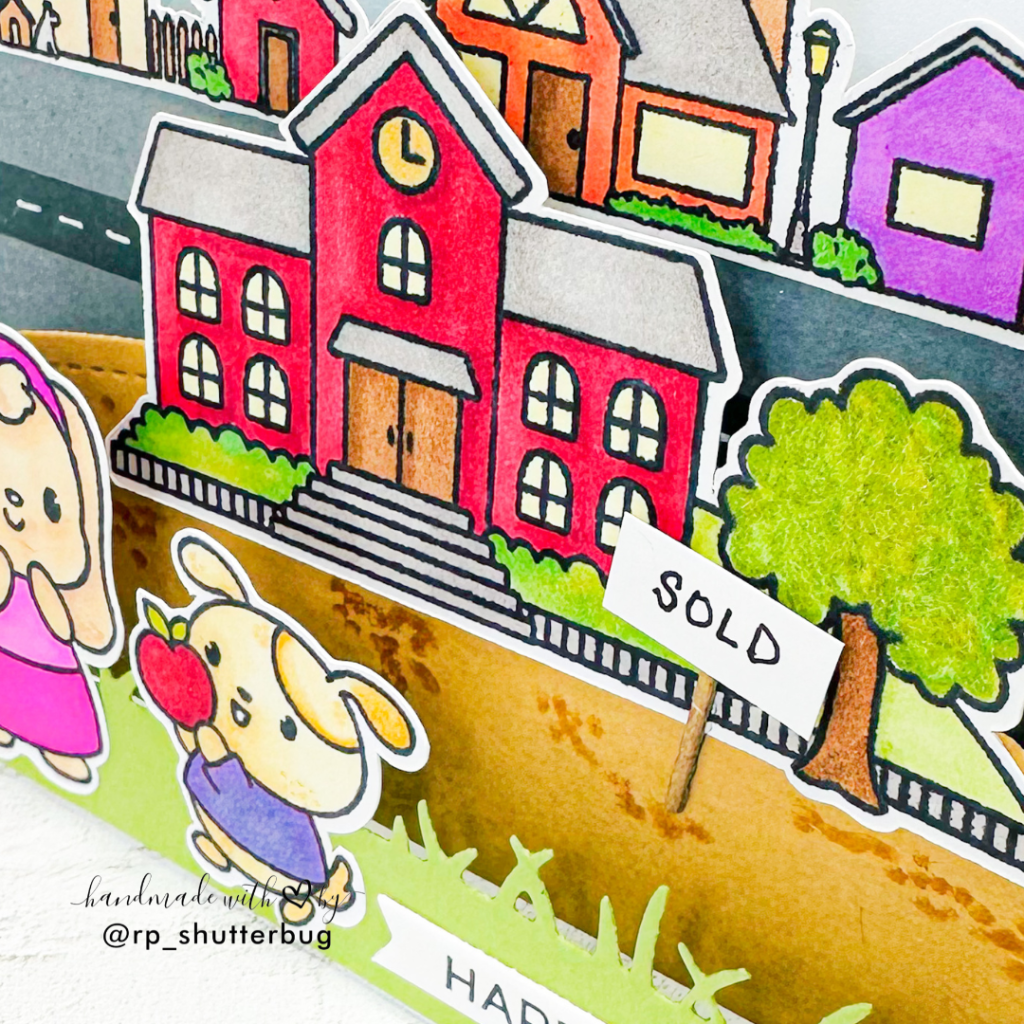
To bring this card to life, I began by stamping a bunch of adorable images from the Thank You, Teacher stamp set by Simon Says Stamp and the Neighborhood stamp set by Altenew. I colored all the images using a mix of Spectrum Noir TriBlend Markers and Ohuhu alcohol markers, which gave them a vibrant and playful look.
Since I didn’t have the coordinating dies on hand, I used my Brother Scan n Cut machine to cut the images out with precision.
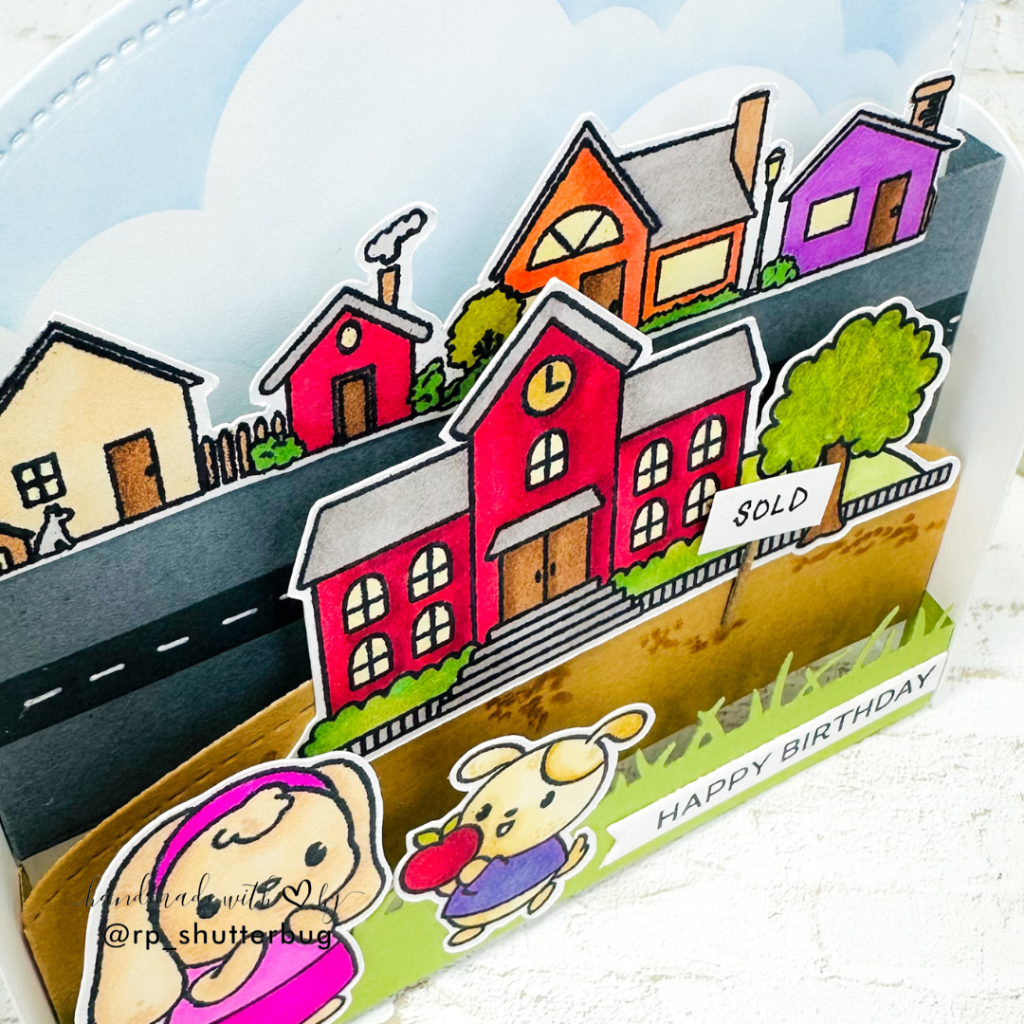
Rather than sticking to a traditional flat A2 card, I opted to create an interactive 3D birthday card using the 3D Pop Up Box Die by Kat Scrappiness. This die set comes with three tiers to help build a boxed scene, and I also incorporated some of the add-ons—the grass border for the first layer, the hill die for the second, and the strip die from the main set for the top tier, where I added the road and buildings.
To add more personality, I used patterned papers from Your Paper Insider for the grass, hills, and road. For the sky, I blended in some fluffy clouds using the Cloud Stencil by Simon Says Stamp before assembling the layers.
Starting with the grass tier, I carefully added each layer, ensuring the stamped images were spaced in a way that kept everything visible and well-balanced. Because this card was created for a friend in real estate, I added a playful little “SOLD” sign. I repurposed a mini tea bag die from Kat Scrappiness, trimmed it down, and hand-lettered the word “SOLD” using a black gel pen to place in front of one of the buildings.
Once my little scene was fully built, I added a “Happy Birthday” letterpress sentiment strip by Spellbinders to the bottom right corner of the box card for a polished finish.
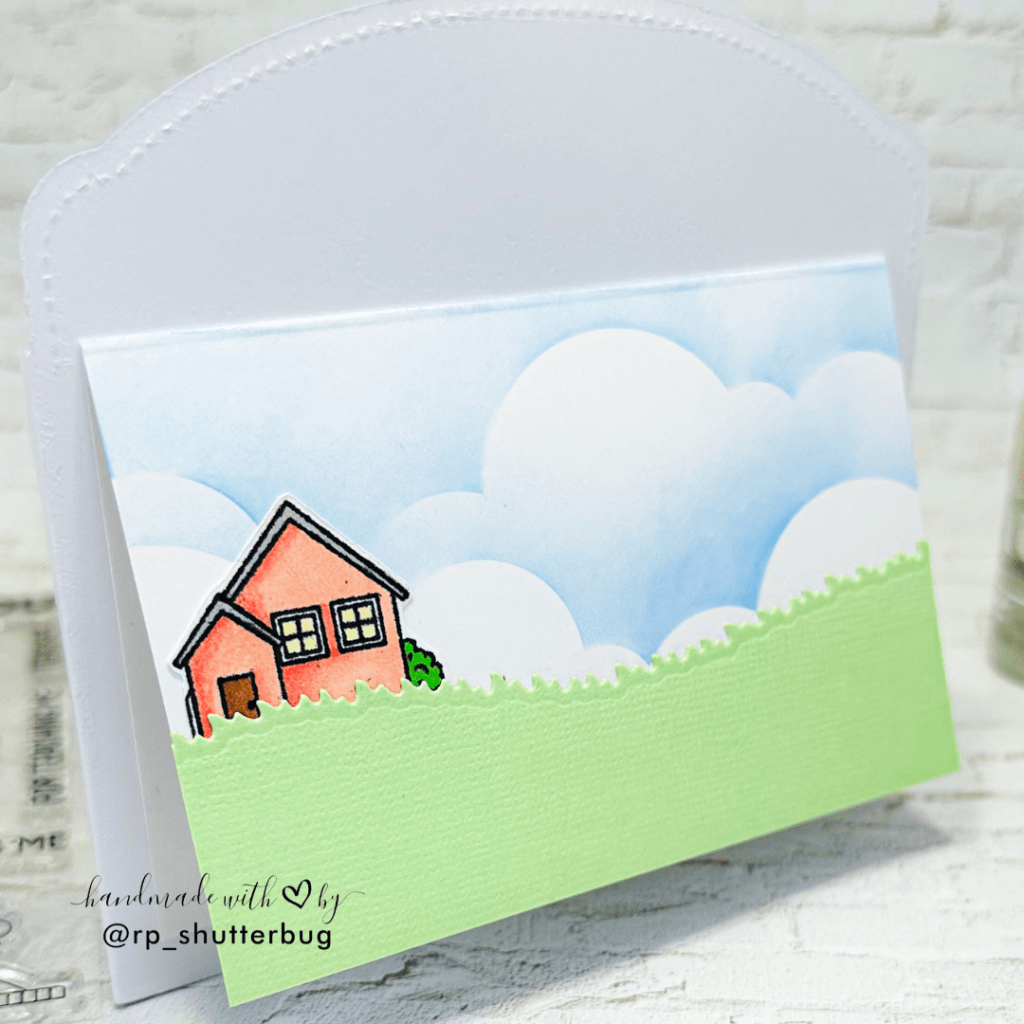
To make space for a message, I created a mini note card that tucks neatly into the back of the box. I stenciled clouds on the front of the note card and added one of the tiny houses to coordinate with the overall theme.
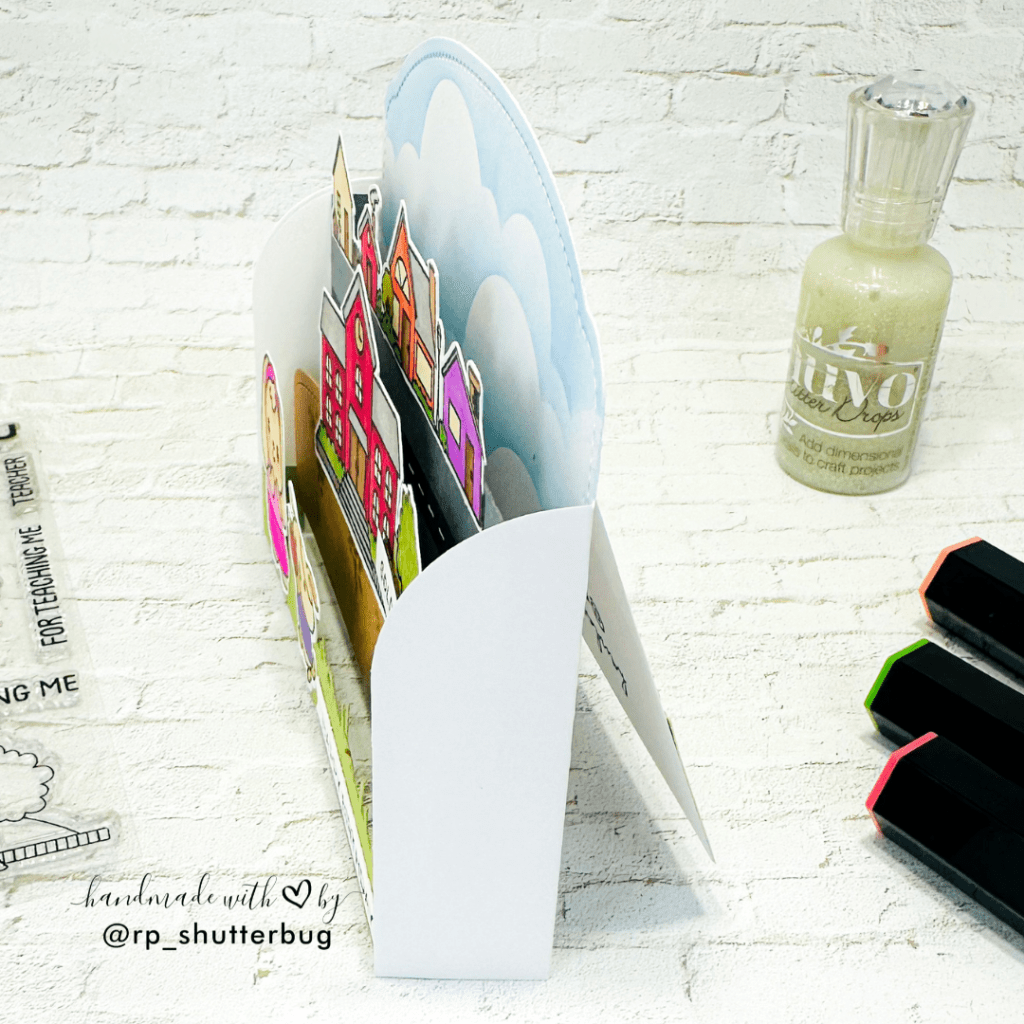
I’m absolutely in love with how this card turned out—it’s dimensional, cheerful, and makes a wonderful keepsake that can be displayed on a desk, shelf, or mantel. It’s a little gift in itself!

This interactive box card was such a joy to create—from mixing and matching products from different brands to building up a fun little scene with so much dimension and personality. I love how it turned out, and I hope it inspires you to try something similar with the supplies you already have in your stash. Whether you’re crafting for a birthday, saying thanks, or welcoming someone to the neighborhood, this versatile design can be easily customized for any occasion.
Also, don’t forget to check out my Instagram profile (@rp_shutterbug) where I share a ton of inspirations and fun projects.
SUPPLIES:
*NOTE: Affiliate links may be used (at no additional cost to you) – thank you for your support!
 https://linkdeli.com/widget.js?id=f5e8378456858c916708
Thank you again for joining me today. Until next time, stay safe.


Leave a comment