Hello crafty friends,
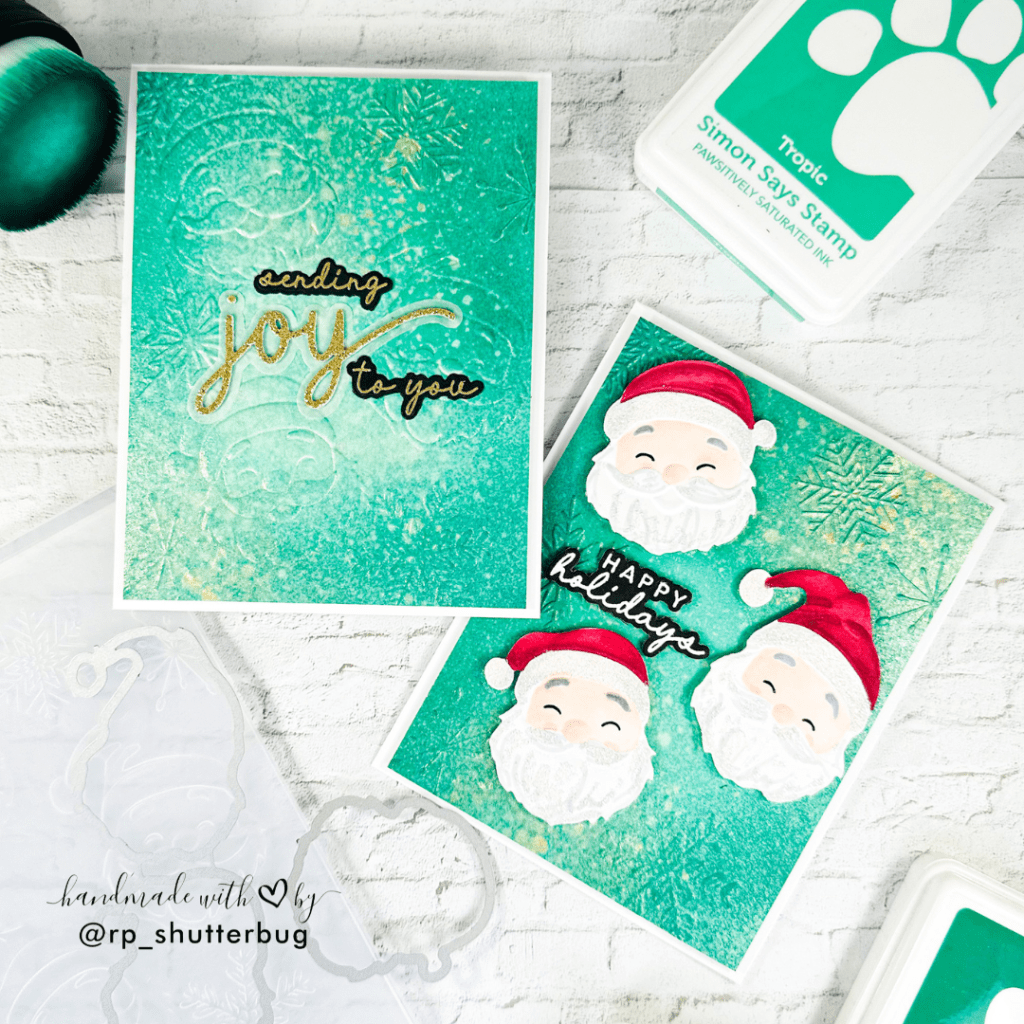
The holiday season is the perfect time to get creative with card-making, and this year, I had so much fun designing two festive Christmas cards featuring jolly Santa faces. Using the latest Sugar and Spice release from Simon Says Stamp, I combined embossing folders, coordinating dies, ink blending, and shimmering accents to create cards that are both cheerful and elegant. In this post, I’ll walk you through the step-by-step process so you can recreate these cards at home.
I started by cutting two panels of white cardstock to 4¼” x 5½”, which is standard A2 size. Later, I trimmed them slightly to 4″ x 5¼” to create a clean border. Before embossing, I lightly misted the panels with water to loosen the fibers, ensuring they wouldn’t crack in the die-cutting machine.
Next, I embossed my die-cut Santa faces by carefully aligning them with the embossing folder — like putting together a puzzle! Tiny pieces were held in place with small pieces of washi tape to prevent shifting.
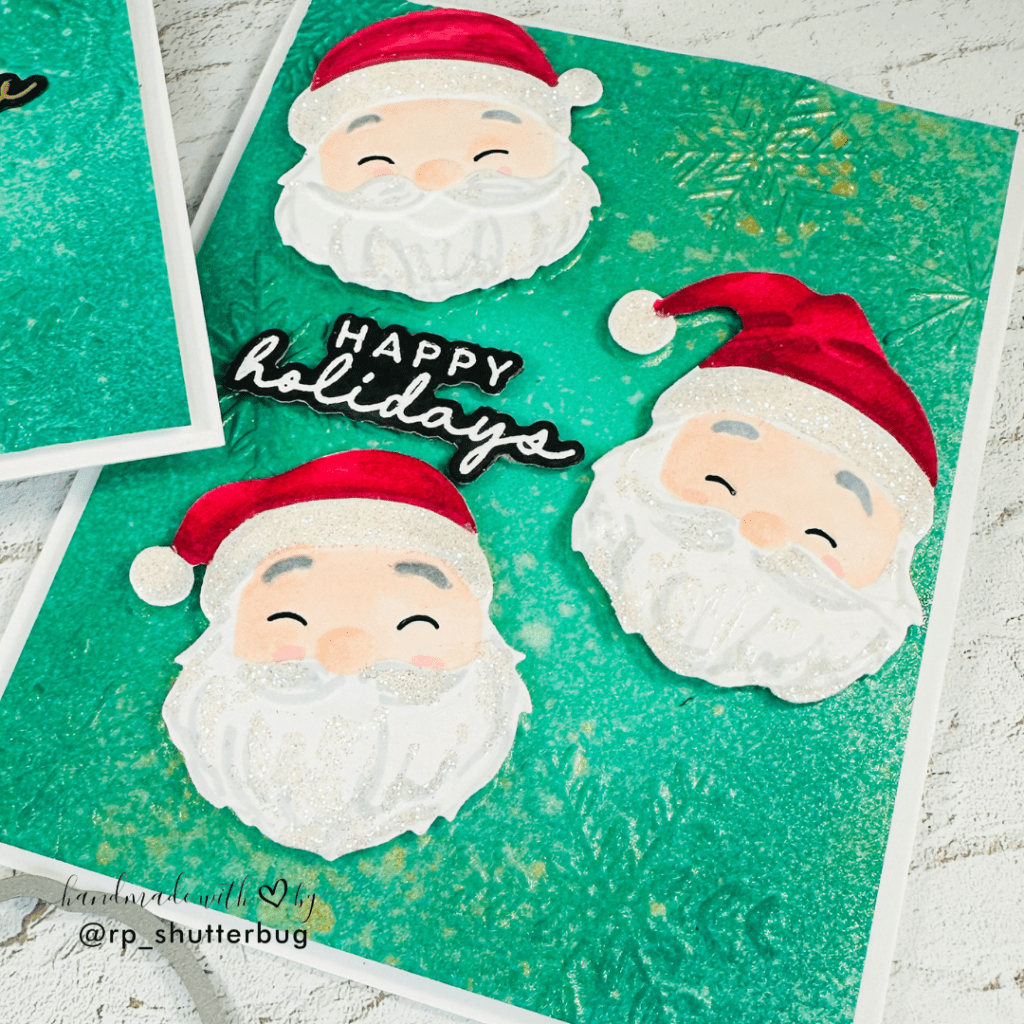
For coloring, I used Spectrum Noir TriBlend markers. Red shades brought Santa’s hat to life, skin tones added warmth to his face, and light grey gave subtle shading to the beard and hat trim. A touch of pink on the cheeks added a jolly blush. These markers are perfect for shading because each marker comes with three coordinating tones, making dimensional coloring effortless. I finished the faces by adding black gel pen details to the eyes, which really made them pop.
To add that festive shimmer, I applied Glossy Accents to the white areas of the hats, beards, and mustaches, and sprinkled white glitter powder over the wet areas. Once dry, the texture and sparkle really brought the Santas to life.
While the Santas dried, I worked on the embossed backgrounds. Using my glass mat and Altenew blending brushes, I ink blended Aegean, Tropic, and Tidepool inks. Starting with the lightest shade in the center, I radiated outward with the darker greens to create a smooth gradient. After blending, I sprayed the panels with shimmer mist and a hint of Fossilized Amber Distress Mica Spray to add subtle golden sparkle.

For the first card, I used the “JOY” die cut from glitter cardstock with a vellum shadow layer and stacked on plain white cardstock for dimension. For the second card, I adhered the colored Santa faces using small foam circles for lift. Sub-sentiments were added using the Peaceful Trees Stamp and Die Set: gold heat embossed “Sending” and “to you” for the JOY card, and white heat embossed “Happy Holidays” for the Santa card.
These two festive holiday cards are full of texture, sparkle, and charm — perfect for sending cheer this season! The combination of embossing, die cuts, ink blending, and glitter makes the cards feel both professional and playful. The best part is how versatile these techniques are; you can adapt the colors and sentiments to create your own unique holiday designs. I hope this tutorial inspires you to create your own embossed, ink-blended holiday cards and spread a little festive joy this season!
If you would like to see a video tutorial of how I created this card, check out the link below –
Do check out fun pictures of the project on my Instagram page (@rp_shutterbug). Do tag me on Instagram with pictures of your projects.
SUPPLIES:
*NOTE: Affiliate links may be used (at no additional cost to you) – thank you for your support!
 https://linkdeli.com/widget.js?id=f5e8378456858c916708
Thank you for joining me today. Until next time, stay safe!


Leave a comment