Hello crafty friends,
Welcome to my second project for the AECP Level 3, where I’m diving into a fun technique! I recently took Nicole Watt’s Stencils Unleashed: Advanced Stenciled Techniques class, and one lesson really stood out to me—the use of a Charcoal pencil to add shading to stenciled images. This was a completely new technique for me, and I have to say, it was such a fun process! The added depth and dimension it brought to my background panel were incredible, and I’m excited to incorporate this technique not just on stenciled backgrounds but also on stamped and colored images in the future.
Here’s a look at the card that I created today –
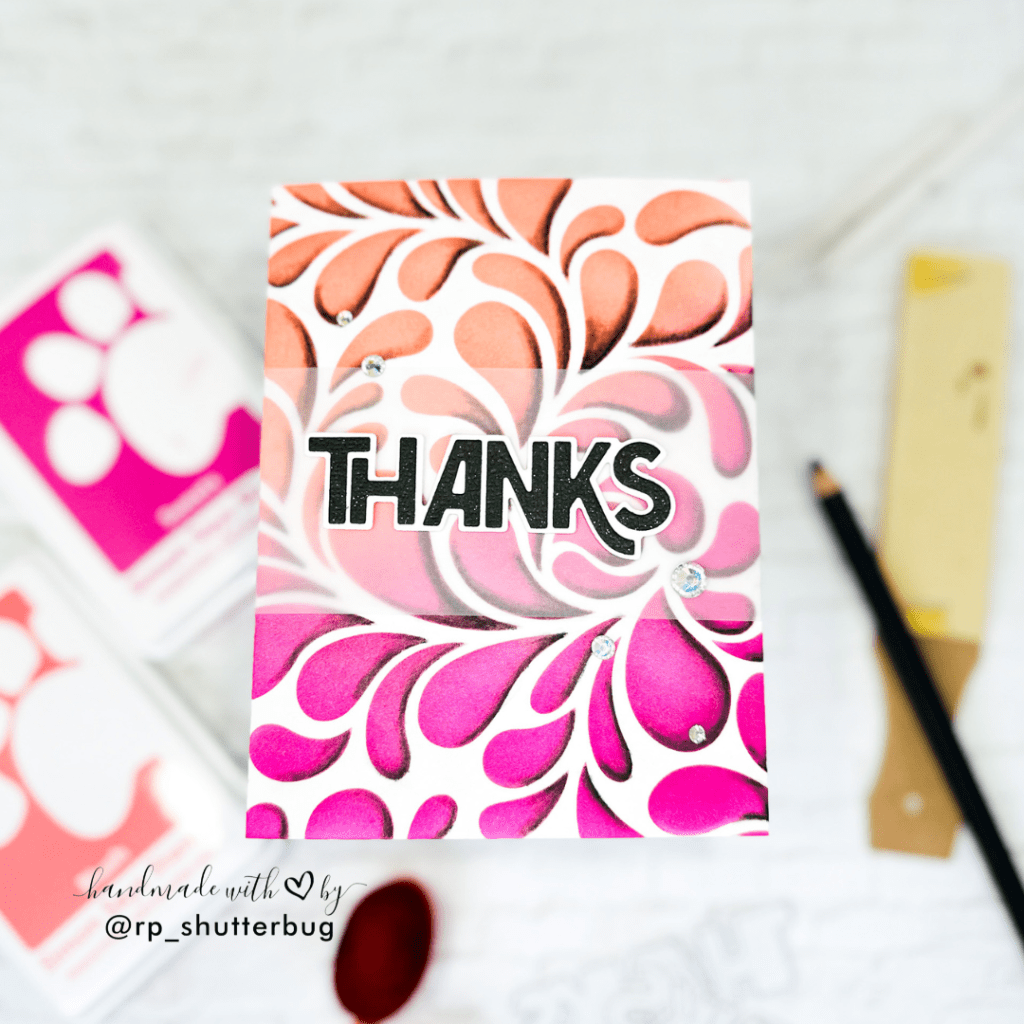
I started with a simple ink blended background. I used the Flowing Drops Stencil along with my favorite color combination. I used the SSS Pawsitively Saturated Inks in the shades – Taffy, Sweets, Blush and Grapefruit.

Once I was done ink blending, I used my soft Charcoal Pencil and added a just the slightest amount of shade along the lower edge of the drops. It was more like, drawing a border for my drop using the charcoal pencil. I first determined where I wanted my shadow, which was by determining where I would have the source of light coming from. I then drew pencil lines on multiple drops at a time before proceeding to the next step.
Next, we need a paper stump which is a cylindrical drawing tool, usually made of soft paper that is tightly wound into a stick and sanded to a point at both ends. Using the paper stump, I very slowly and carefully blended the line that I drew using the charcoal pencil. The stump blended out the pencil line, smudging it away and creating a depth and dimensional look to the drops.
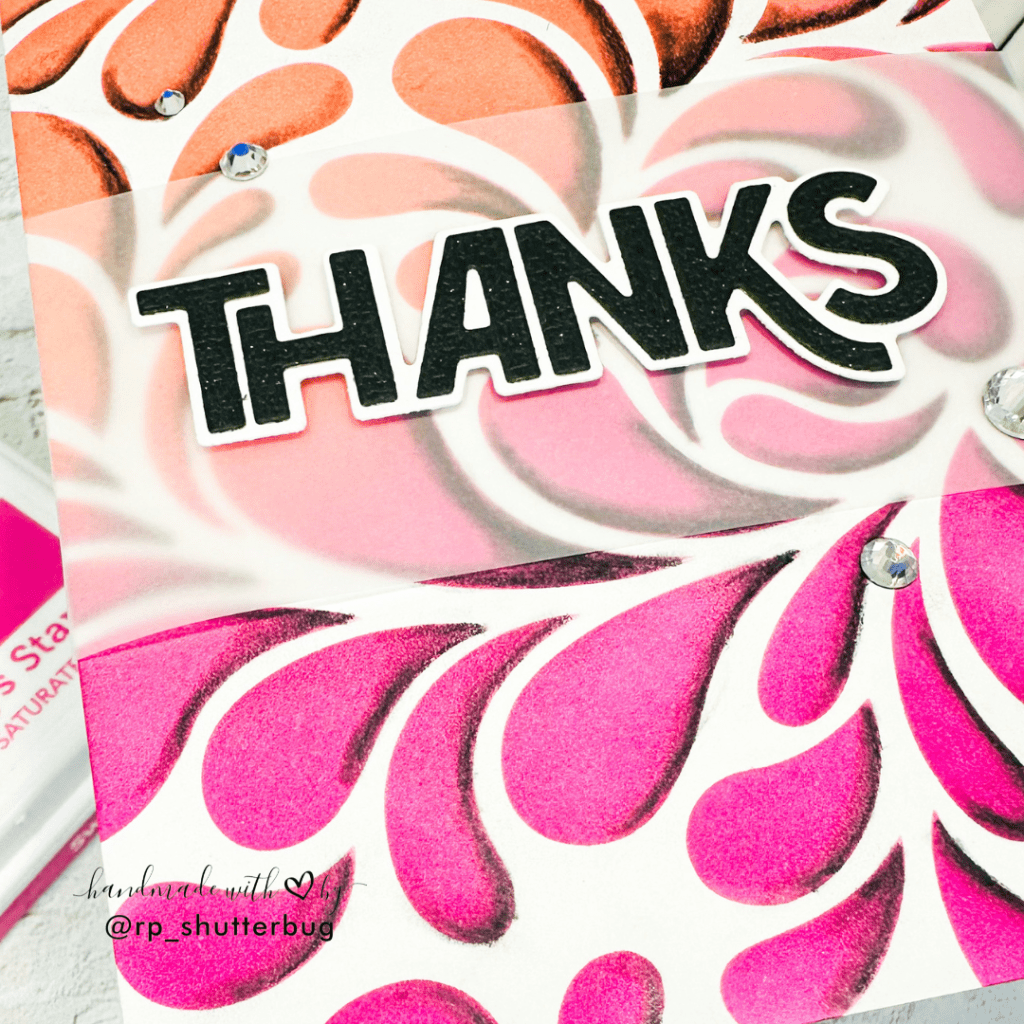
Once our background was done, next I added a sentiment. I used the Bold Thanks Sentiment and added it over a strip of vellum. The vellum will not just tone down the busy background, but will also make sure that my sentiment pops up on that busy background.

I finished off my card with some gorgeous SSS Prism Pawsitively Dazzling Gems, and I couldn’t be happier with how it turned out. The depth and dimension created by the shading technique really adds a stunning touch to the design. While this technique can be a bit time-consuming, the results are definitely worth the effort. I’m excited to experiment with it not just on stenciled backgrounds and images, but also on my stamped images in future projects!
For card #2, I decided to add some silhouettes using stencils. This was a fun way to stretch my supplies.
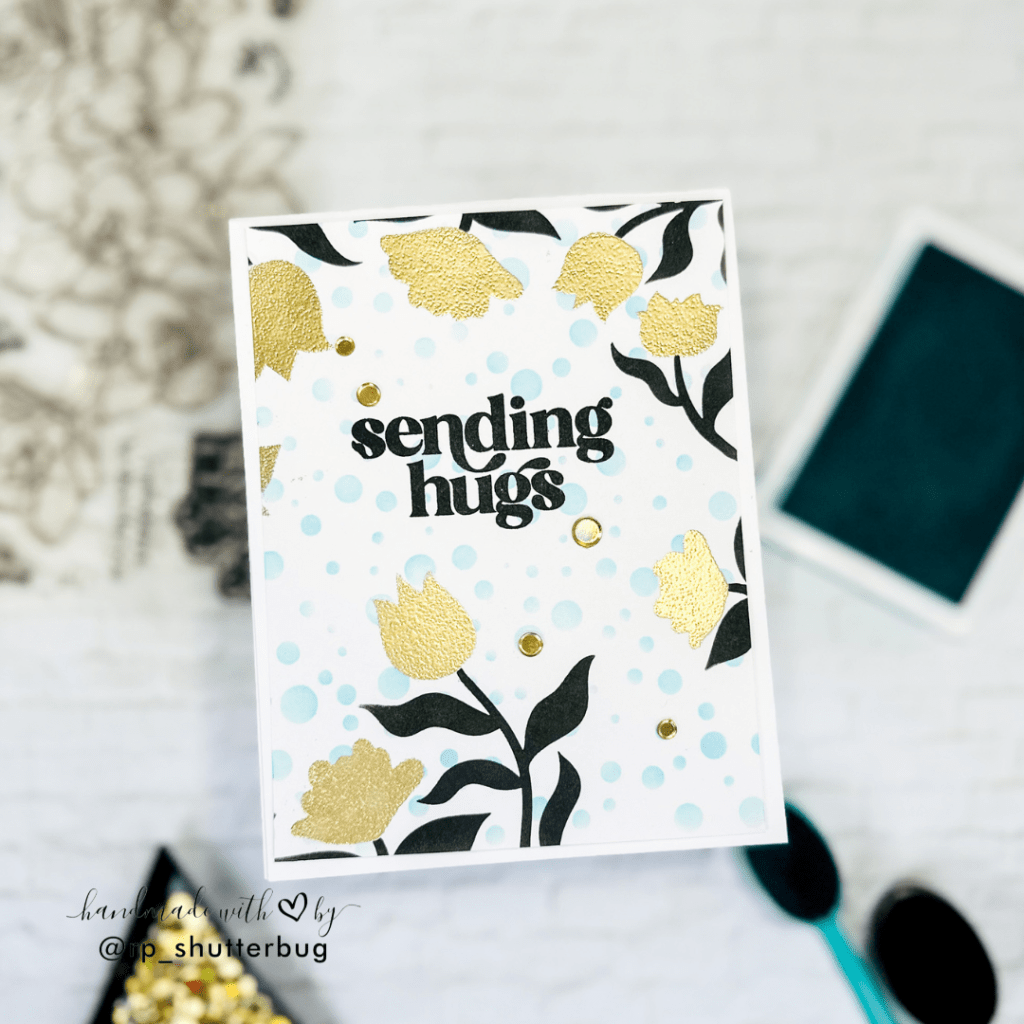
I wanted to create a floral border using my Imaginary Jungle Stencil, which I have always used with the coordinating embossing folder. But this was indeed a fun way to make use of this stencil. This was a 3 part stencil and I ended up using just 2 layers of the stencil.
I started with the layers where we have the flowers. I wanted to add shine on this layer, so I blended some VersaMark Ink over the flowers. I used a sponge dabber to dab the ink and then added SSS Gold Embossing Powder and heat set it.

Before I add my stems, I decided to work on my background, for which I used the Tiny Bubbles Stencil. I used a very light shade of teal to ink blend all over the background. I love the teal and gold color combination. I feel this 2 colors perfectly compliment each other.
Next I layered the 2nd stencil which had all the stems. I wanted to create a very dark black silhouette look on my stems, so I ink blended using Versafine Onyx Black Ink which is a very heavy and intense black ink.
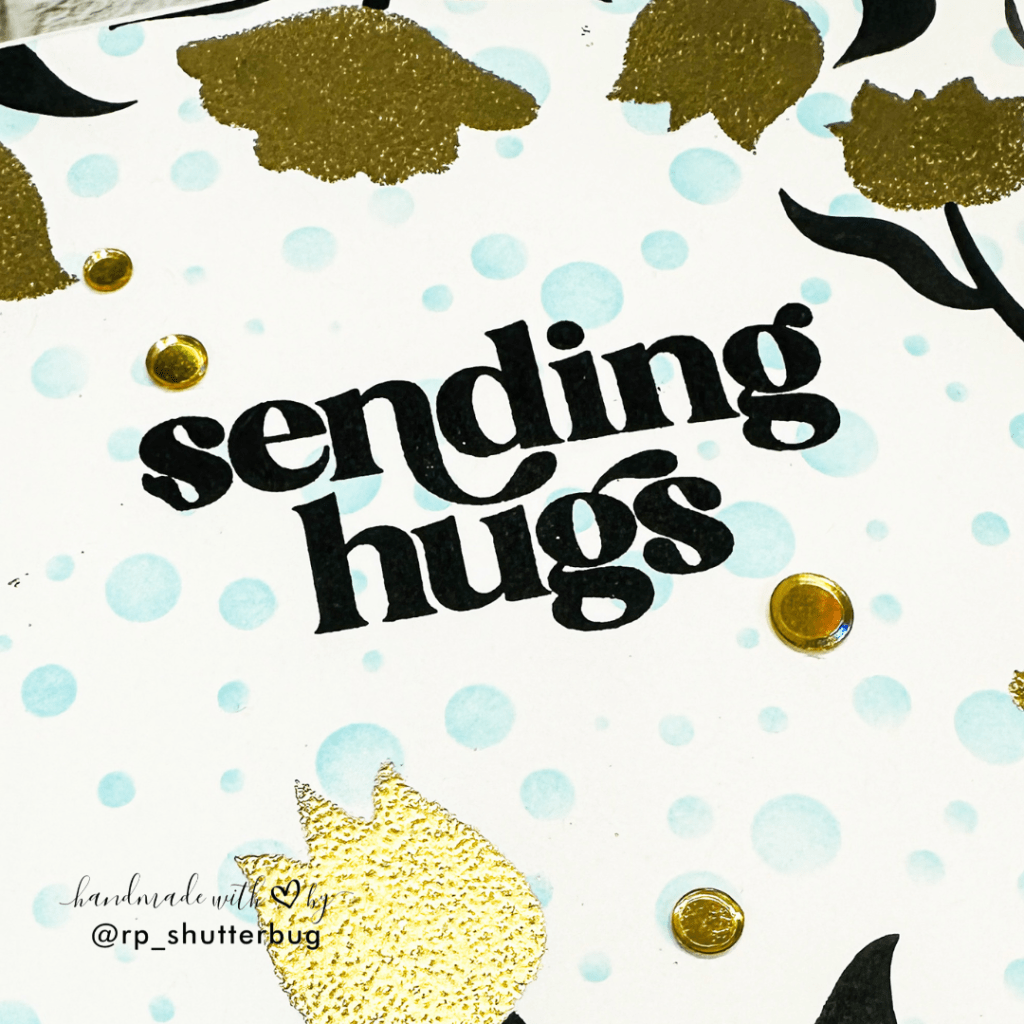
I then added my sentiment form the Alluring Orchids Stamp Set along with some Gold Hologram Sequins by This Calls For Confetti.
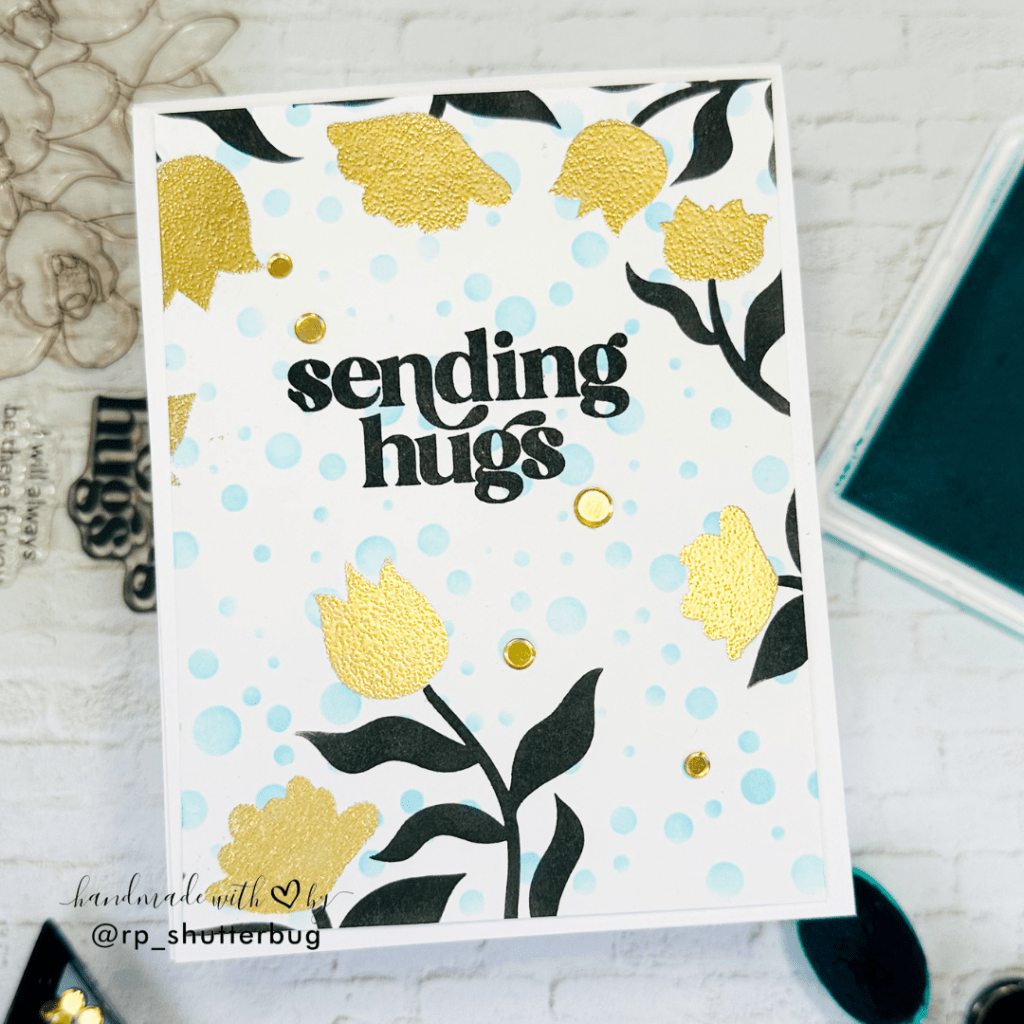
I’m absolutely in love with how this card turned out! The clean and simple design, paired with the stunning gold and teal color combination, looks even more breathtaking in person. Initially, I wouldn’t have considered using the Imaginary Jungle Stencil on its own without the coordinating embossing folder, but I’m so glad I took the leap and tried this technique. It’s such a fun and creative way to make the most of your crafty supplies!
The Altenew Educator Certification Program is definitely a best opportunity to showcase my work and get in touch with all of the amazing crafters.

Thank you for being here with me today. Do check out fun pictures and videos of the project on my Instagram page (@rp_shutterbug). Also, tag me on Instagram with pictures of your projects.
SUPPLIES:
*NOTE: Affiliate links may be used (at no additional cost to you) – thank you for your support!
 https://linkdeli.com/widget.js?id=f5e8378456858c916708
Thank you again for joining me today. Until next time, stay safe.


Leave a reply to tracistarkweather Cancel reply